This question hits racers, teams, managers and event organizers every year. Stuff like this is off topic for the public of course, so this article is not addressed to you- but maybe interesting enough to get an idea what’s going on in motorcycle racing for example.
When you start amateur racing, then there is a bunch of stuff going on in your head, also this… dreams, hope, wish-thinking. Yea, I know, I was there too so give me a break. So what’s happening from September till March is that thousands and thousands of athletes worldwide are looking naively for monetary support by RedBull with a 10 years contract… literally. So here is what I’ve learned as I walked from the slowest amateur racer to a professional racer who almost made it to MotoGP.
Yea, I can hear voices saying again: ‘that was long time ago’, but believe me… nothing has been changed much. Well we have the internet and social media and blogs now too, and it seems that this should help to get to potential sponsors- whil I actually believe it makes it harder FOR the sponsor to pick the right horse since everyone tuned to a keyboard jockey and blows up Youtube with gazillions of gigabytes of more or less senseless 20 minutes track sessions. Am I sound mean? No, I just try to open your mind for whats wrong and whats right, so stick with me and let me show you first where all the wish-thinking like this brought us…
There is that couple who of course believe that their son is the next Marc Marquez. That’s totally fine of course, but blaming the entire industry for making all those mistakes in regard ‘our future talents’ is not quite correct. A promising lap on some go kart seems to deliver enough arguments for getting a Monster Energy contract, but this demanding attitude produces two psychological dead end roads…
amateur racers getting the idea that racing without sponsors is not going anywhere and give up
potential talents are not even start to race without having sponsors
I received a call from a Mom, asking me to support their kid by paying their racing fuel. After I told her that I competed against 120 racers to even qualify for an amateur race, and that I didn’t had money for racing fuel either… and that I also had to use slick tires in rain, and also that I kicked ass anyway, and that exactly that’s why I got my first check from a sponsor… she hung up on me. What’s that called… to much reality check?!
It takes many years of sweat and blood to make people believe in a racer. There is a relationship growing which builds something very important… a shield of loyalty, which kicks in when your results are not good sometimes.
https://www.superbike-coach.com/wp-content/uploads/2022/11/racing-intelligence.jpg448612PageAdminhttps://www.superbike-coach.com/wp-content/uploads/2014/12/newlogo.pngPageAdmin2016-09-13 10:36:372024-01-14 23:40:21How to find Sponsors to Support your Racing Career
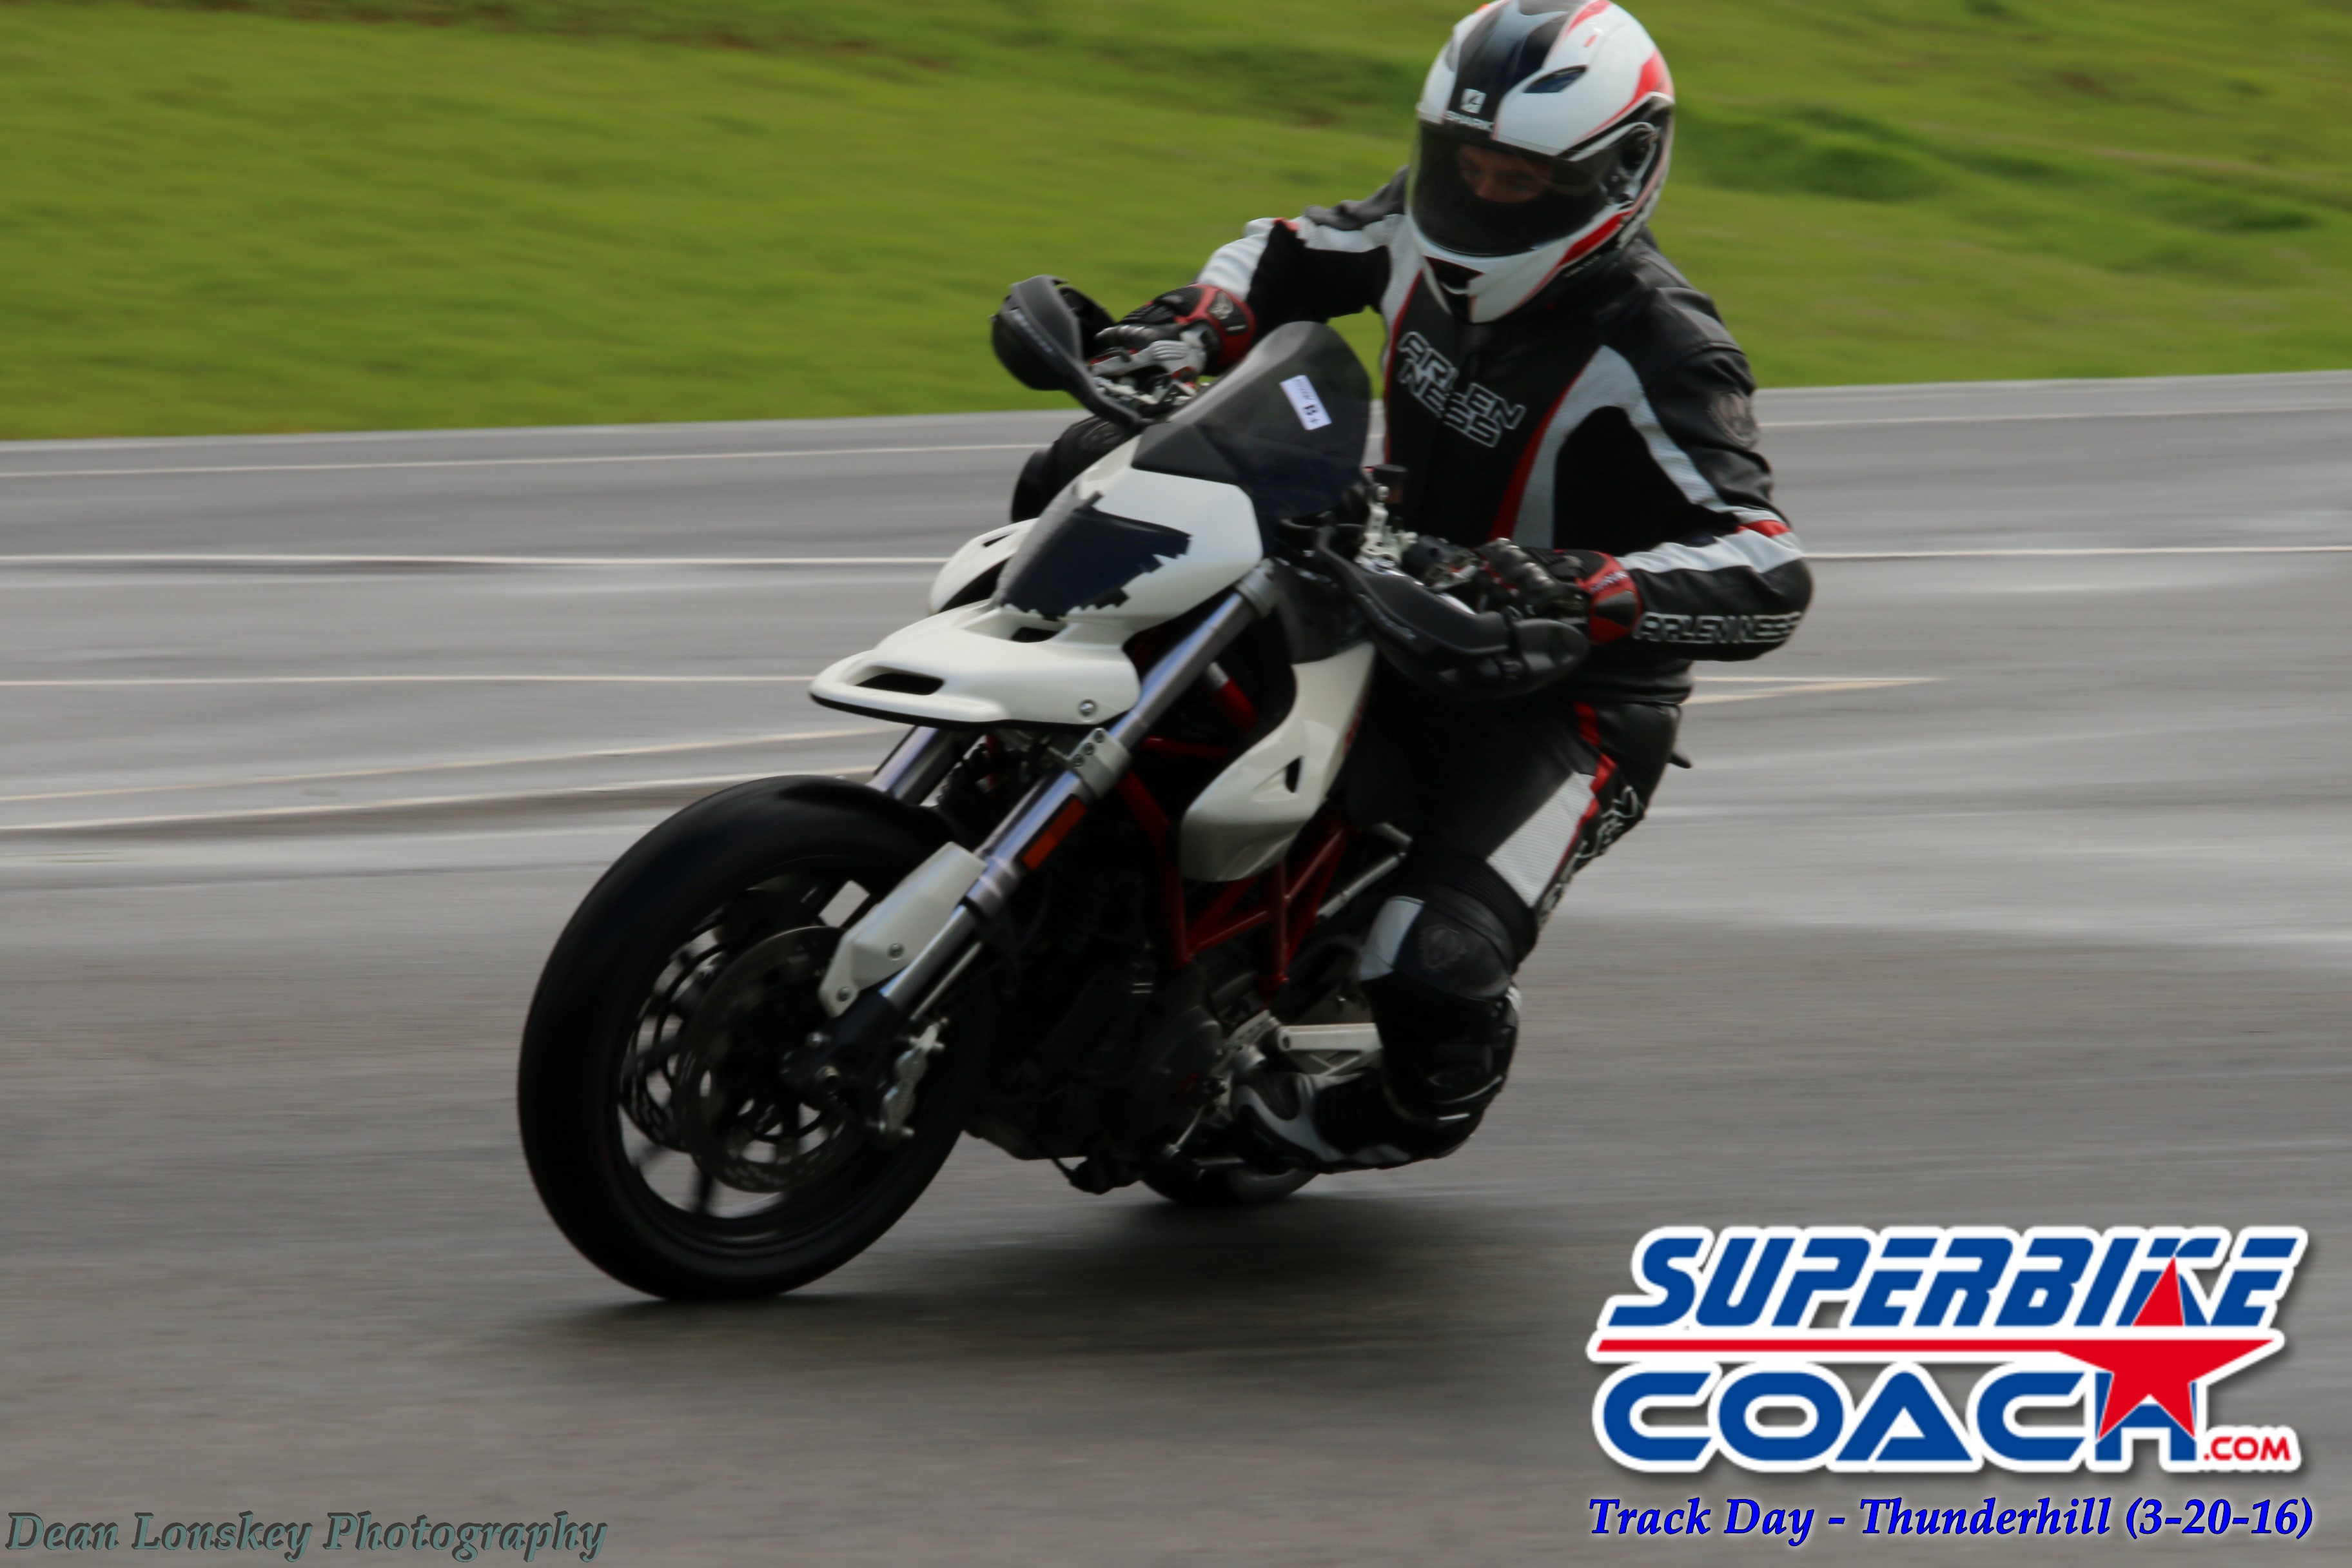
They were going through day 1 and 2 with me, and the pictures showing clearly their confidence level today. It makes me believe even more that the stuff I am teaching has the efficiency I am aiming for. Dean Lonskey’s pictures are telling the story. Enjopy
https://www.superbike-coach.com/wp-content/uploads/2014/12/newlogo.png00PageAdminhttps://www.superbike-coach.com/wp-content/uploads/2014/12/newlogo.pngPageAdmin2016-07-27 10:34:582024-01-14 23:43:38Cornering School Day 3 – Featured pics
I am passionate about motorcycle riding skills, and devote my time to coaching. It makes me crazy when I identify a bad habit, and the student tells me that he or she learned this from some motorcycle school. There may be differences of opinion on certain techniques. But there is also objectively WRONG advice out there. It is making you slower and less safe.
The very worst technique taught by some schools is to go for a “late apex at all cost.” That is, to drive deeper into the turn, then make a more violent tip in, shooting for a very late apex. Sure, there are track situations when the true apex is more than halfway through the turn. But habitually following this line is not necessarily the best line on a track, and can be deadly on the highway.
I spend too much coaching time teaching that the “late apex at all cost” concept is wrong, and breaking the bad habits based on bad advice. In a right turn on a road with oncoming traffic (or a potential of oncoming traffic around a blind turn), it is unsafe to go to (or over) the center line just to make a late entry into the turn. It can be deadly. If you think you need to drop in so late to make a reduced radius turn, you are certainly over the speed limit, and probably over a safe speed.
On the track, focus on the fastest line through the entire course. The best line for a particular turn necessarily depends on what follows. A “late” apex may be OK if it sets up one or two turns down the track. Building total track awareness takes time and focus. Professional coaching will identify bad habits and techniques, and will greatly reduce the time a rider needs to build speed and safety.
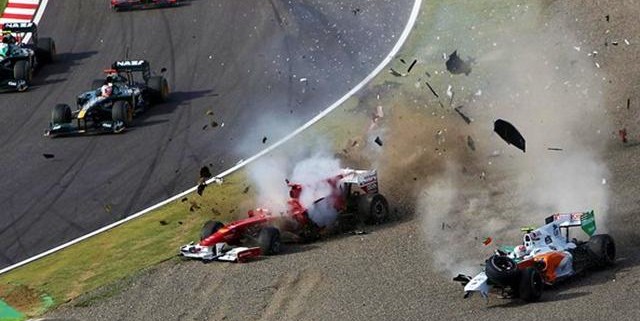
…that’s a hard to answer question since there is always the principals of the chaos which can’t be foreseen. This is why I’ll put it on you, and to make your own opinion about it. Though, I want to share with you something which I am worried about since it came up in the 90’s… when asphalt surfaces replaced the gravel beds around the turns of race tracks.
I believe Formula One boss Bernie Ecclestone came up with it since a simple runn-off the track causes the end of race for multi million dollar teams whom turning off their sponsors. You know- F1 cars are pretty fragile and get stuck in those traditional gravel-beds which were designed to slow a crashed rider or race car down before hitting the damn barrier. We- the motorcycle racer community back then, called these asphalt driveways “pussy stripes” btw.
In fact, the F1 required all international race tracks to modify their crashing zones in order to get the gig. They were not too unhappy about it because crashed vehicles are easier and quicker to remove. So yea… also race bikes took a ride out on those asphalt stripes and it reduced the ‘grass games’ a little… but i believe it can double the risk of the ‘real bad ones’- especially for the motorcycle racers!
You might think different about it, which is your God given right, but as I seen Luis Salom sliding behind his bike- almost with no reduction of speed… then it is obvious to me. While a bike keeps sliding on asphalt on its flat and hard materials- it also will stay on its path once its down. Luis’s bike bounced off the tire wall right back into him and the impact was real hard. I believe that a gravel bed would have slowed it down by at least 30%, and the bike would have go somewhere else. Yes- nobody knows if that would not end up with his dead, but it would have gained his chance to be still alive by about 30%, doesn’t it?!
Again… there is always a ‘point of no return’, and believe me- I hate those gravel-beds either because I’ve got hurt many times in there- digging limbs deep into the gravel until they break. But I do know that you’ll fall softer as you would drop on grass or even asphalt- just like this gentleman here: https://www.facebook.com/beINSportsUSA/videos/1226535764052910/
I think we’ve been forgotten once more in their $$$ games, but we also just took it. The fatal crash of Luis Salom is hopefully trigger for a critical view at it under the motto… what good for race car drivers- doesn’t automatically mean that it is also good for motorcycle racers.
Headcoach Can Akkaya, Superbike-Coach Corp
https://www.superbike-coach.com/wp-content/uploads/2016/06/runoff2.jpg360640PageAdminhttps://www.superbike-coach.com/wp-content/uploads/2014/12/newlogo.pngPageAdmin2016-06-06 16:14:032024-01-21 22:51:21Would Luis Salom have survive?!
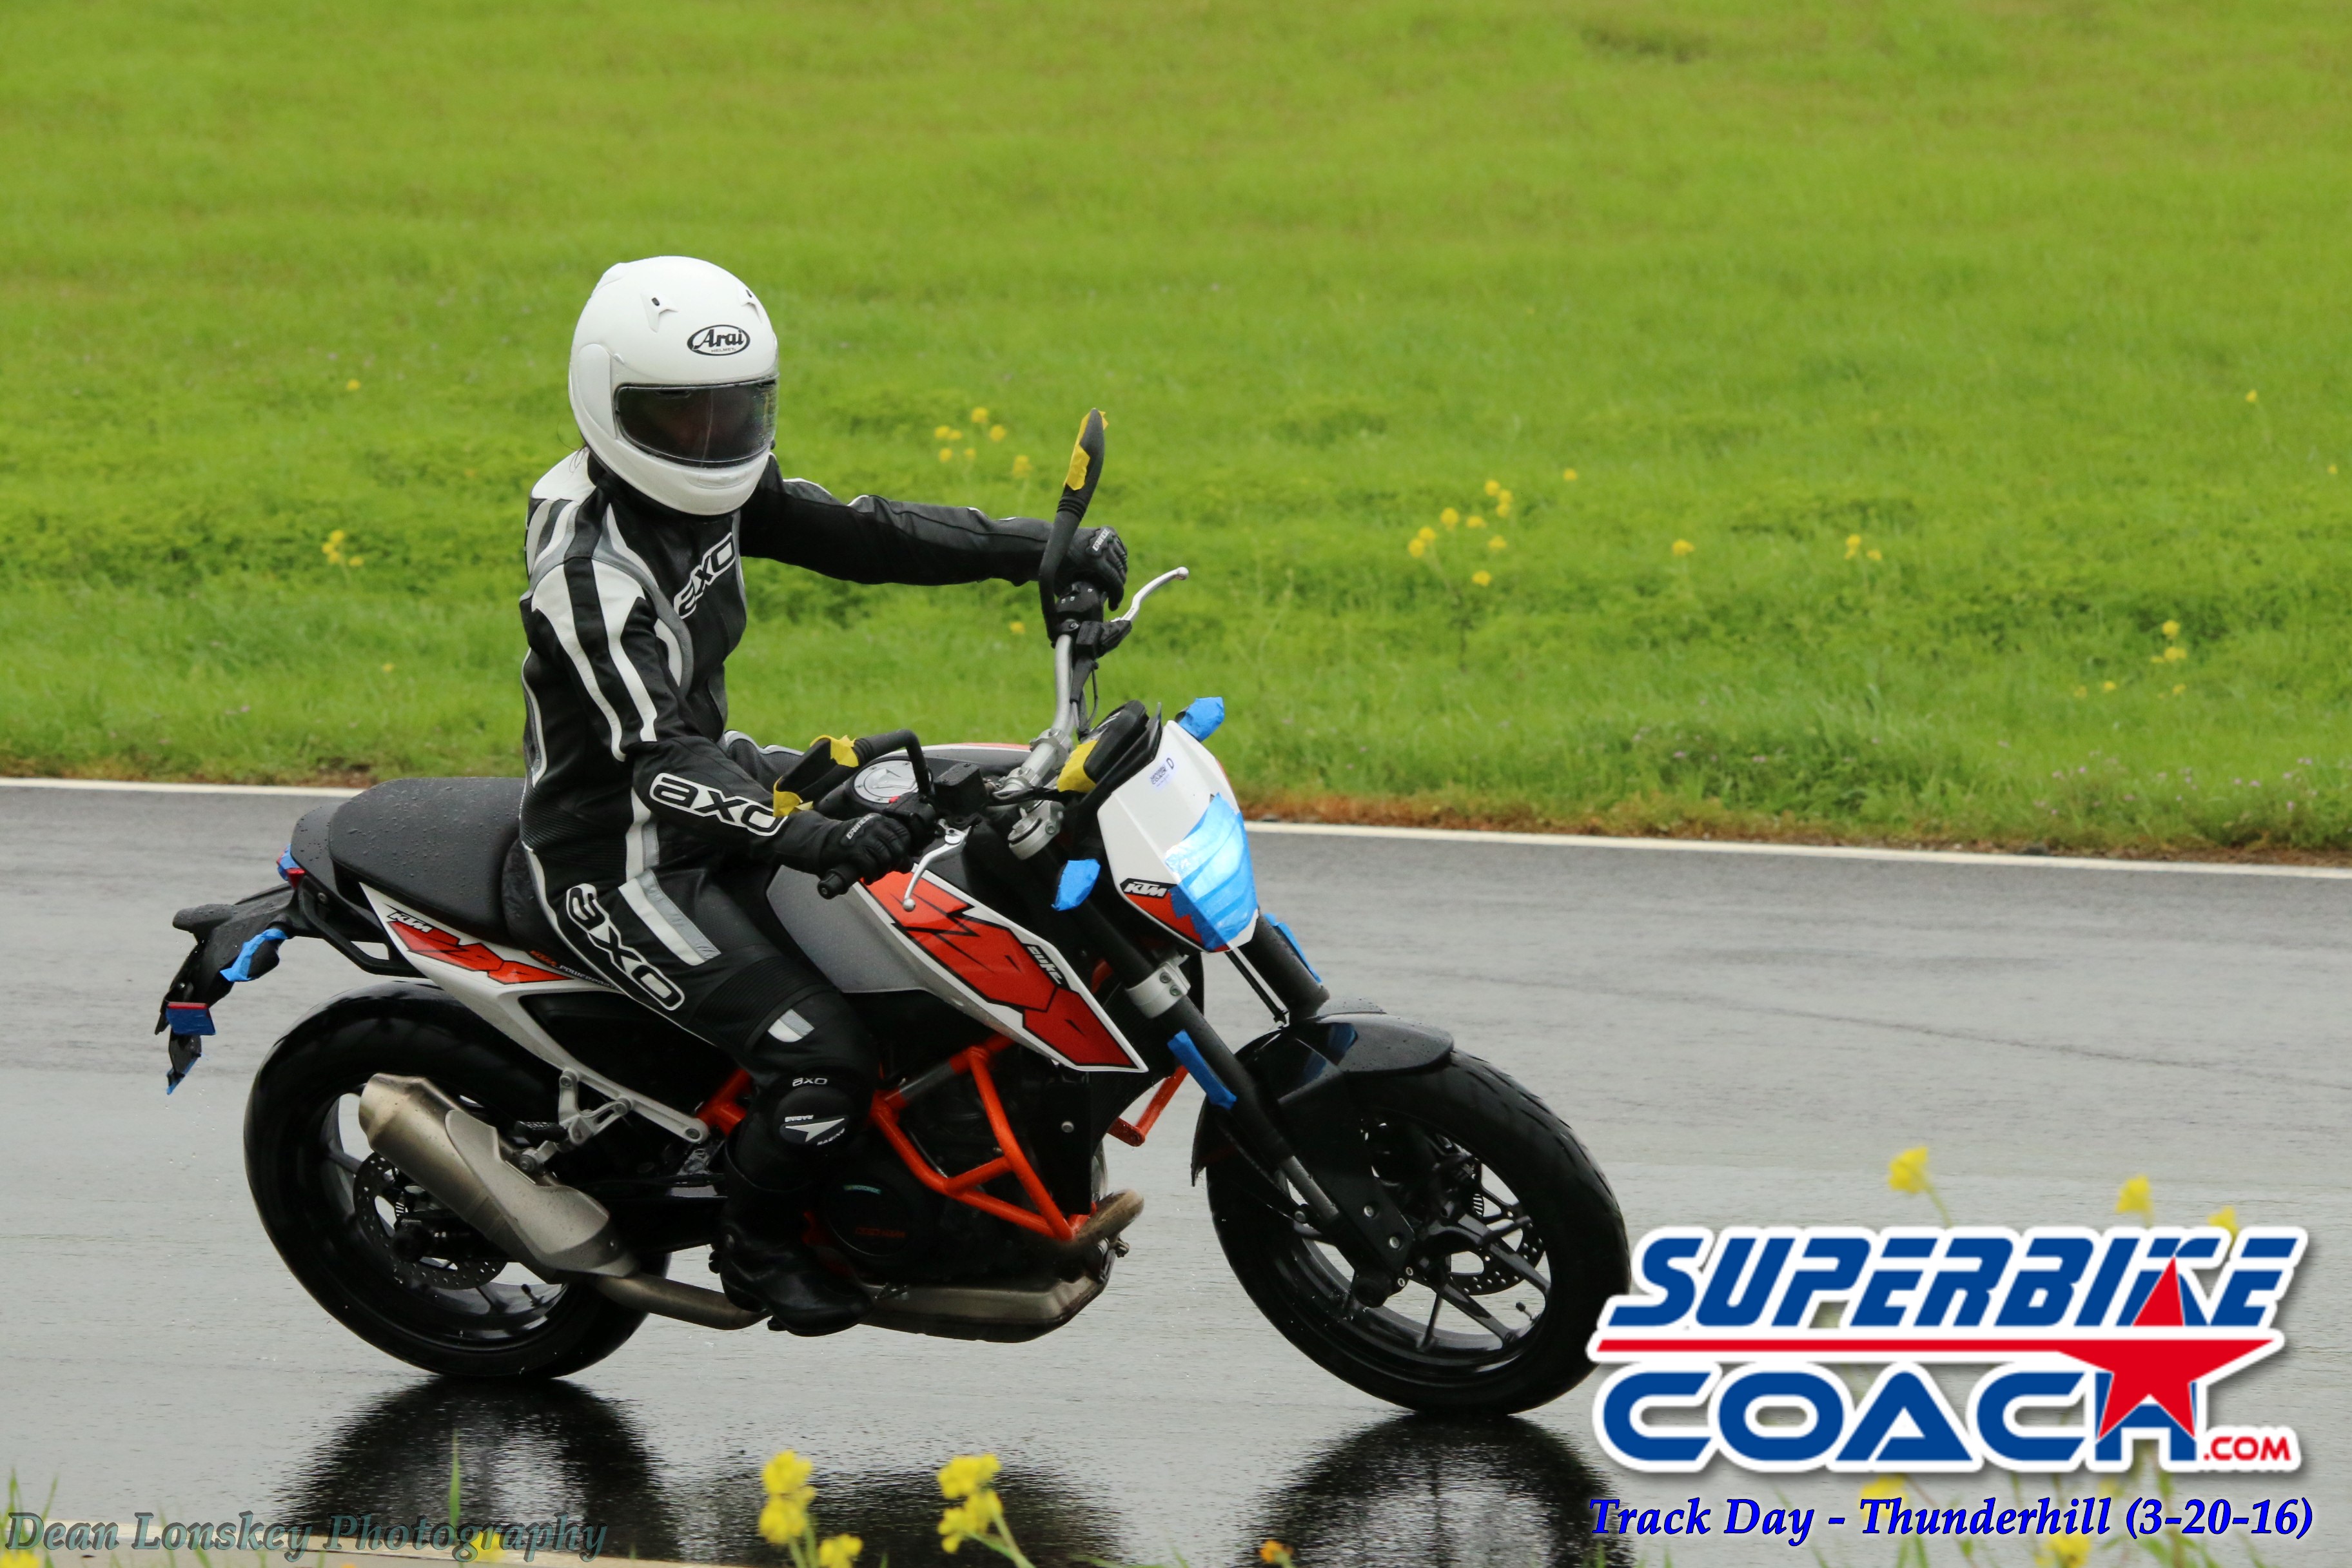
I can’t put in words what it meant to me as we booked out Superbike-Coach’s first organized track day ever- but as 90% of the riders showed up regardless to the weather forecast… that made me real proud. And those people got rewarded for it big time, because the first session was dry and the last three as well.
It was the smoothest going track day I’ve ever been to. These guys didn’t miss a beat. Everybody had a great time even though the first half of the day was wet.- Dave Miao, Track Day, Thunderhill West
Our mission… to deliver a safe and hassle free place where every rider- on every bike can pursuit the happiness. No pressure- no ego- no overrated requirements in gear and bike. The Superbike-Coach team delivered, and beyond.In all the years of working with track providers… I knew what i would have to do to be different, and many experienced track riders confirmed that I did. Even in these conditions we put 5 crashes to the book. No injuries, and all could keep going with the track day.
I wanted to personally thank you for the riding help I have received from your classes in the past six months (CSD1, CSD2, and Track Day) as they have greatly helped in quelling my ‘street ride’ cornering fears – even in the rain- Jerry McHugh, Track Day, Thunderhill West Raceway
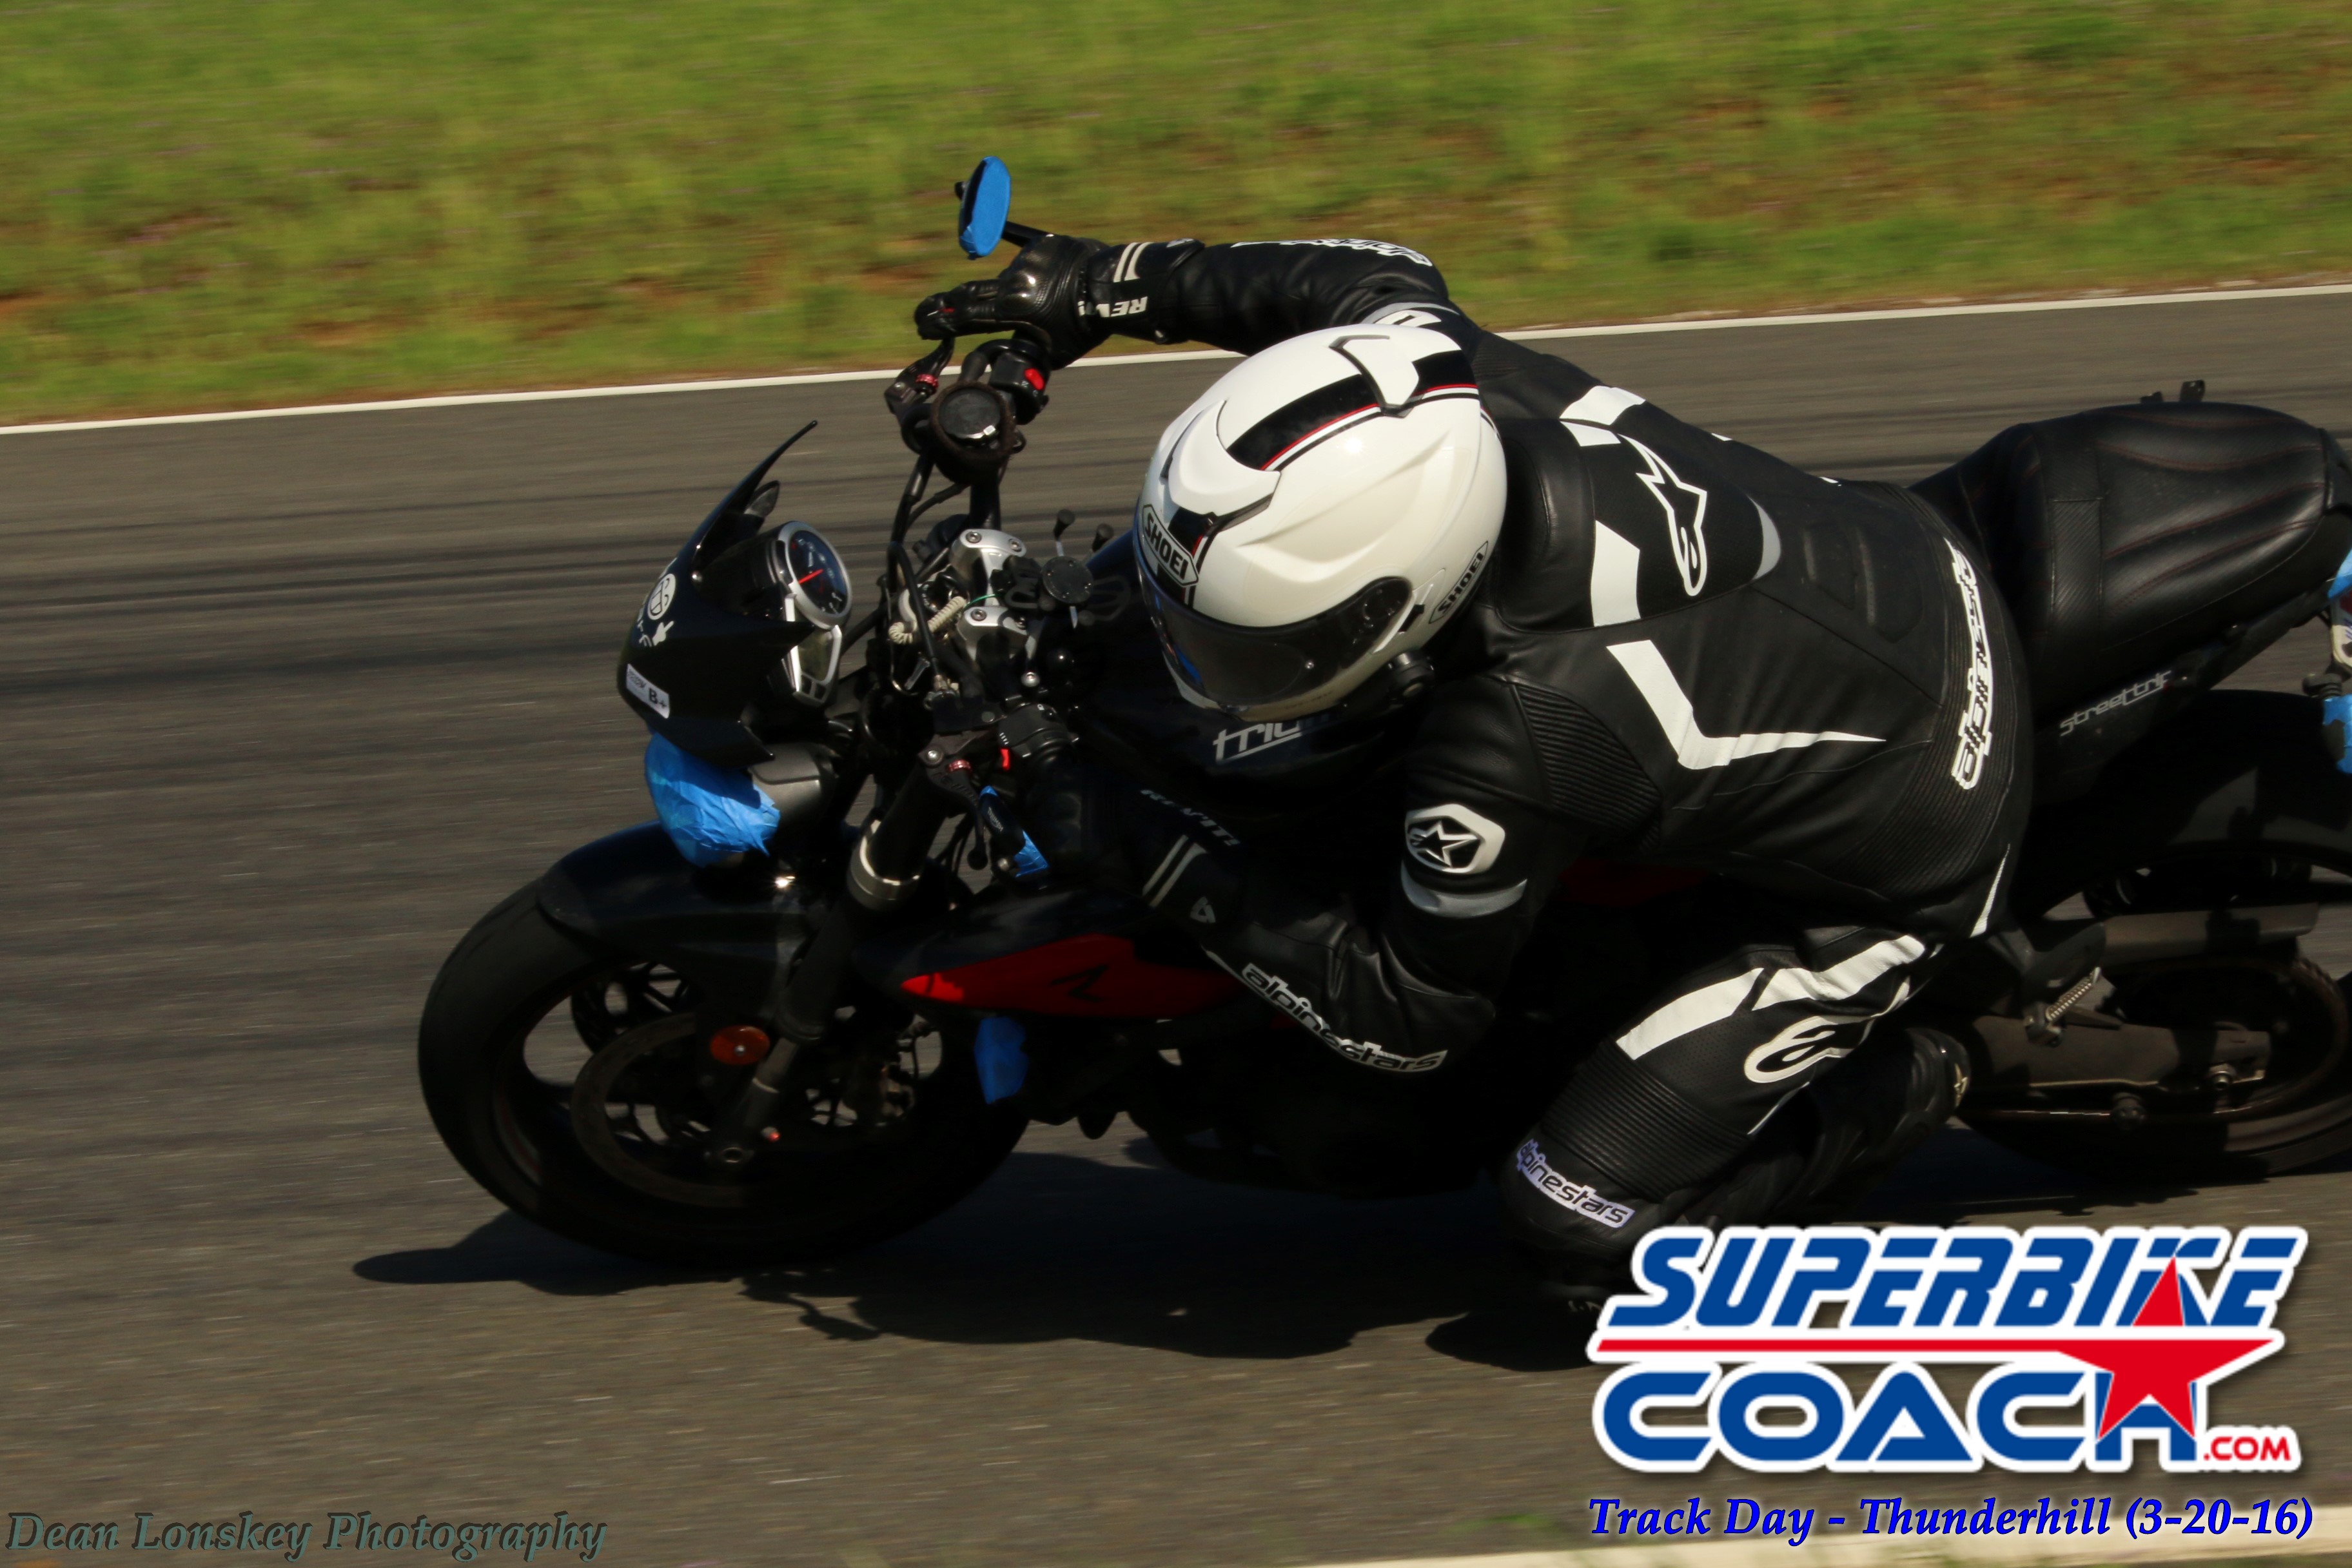
My team worked their butts off to make everything right. With lots of laughter’s and heart they helped to made it an unforgettable experience for our riders. Many of them were/are students of the Superbike-Coach Corp, and that made it feel family. Over 2600 pictures has been made by Superbike-Coach photographer Dean Lonskey, who is also working his tail off during this week to get those picture ready for free (!) download. Also a big THX to my control riders Jerry (B+), Steve and David (B), Dan (C) and Kevin (D), who showed patience and respect to everyone. That’s not common these days! I’ve been blessed to have such a enthusiastic team.
The fact that you guys pulled this off for such a good price, with very little in the way of barring someone from trying it out, and the pictures will be available for free….simply amazing- Ryan George, Track Day, Thunderhill West Raceway
I’ve been so proud for my boys and girls, cuz’ even as it began to rain… they were standing on the grid and all came back in loaded with new things and experiences and a even bigger smile on their faces. The Clubhouse was packed with people as I began my free ‘Ideal Line West Seminar’ at lunch time, and I was even more happy as they told me how much it made them better after all. I was so happy for them as the sun took over.
But it wouldn’t be me if I were totally satisfied, and not seeing what we could have done better. Also that’s why I am happily announcing our very next Superbike-Coach Track Day on April 30th 2016 at Thunderhill West Raceway. Come and join the family!
Headcoach Can Akkaya
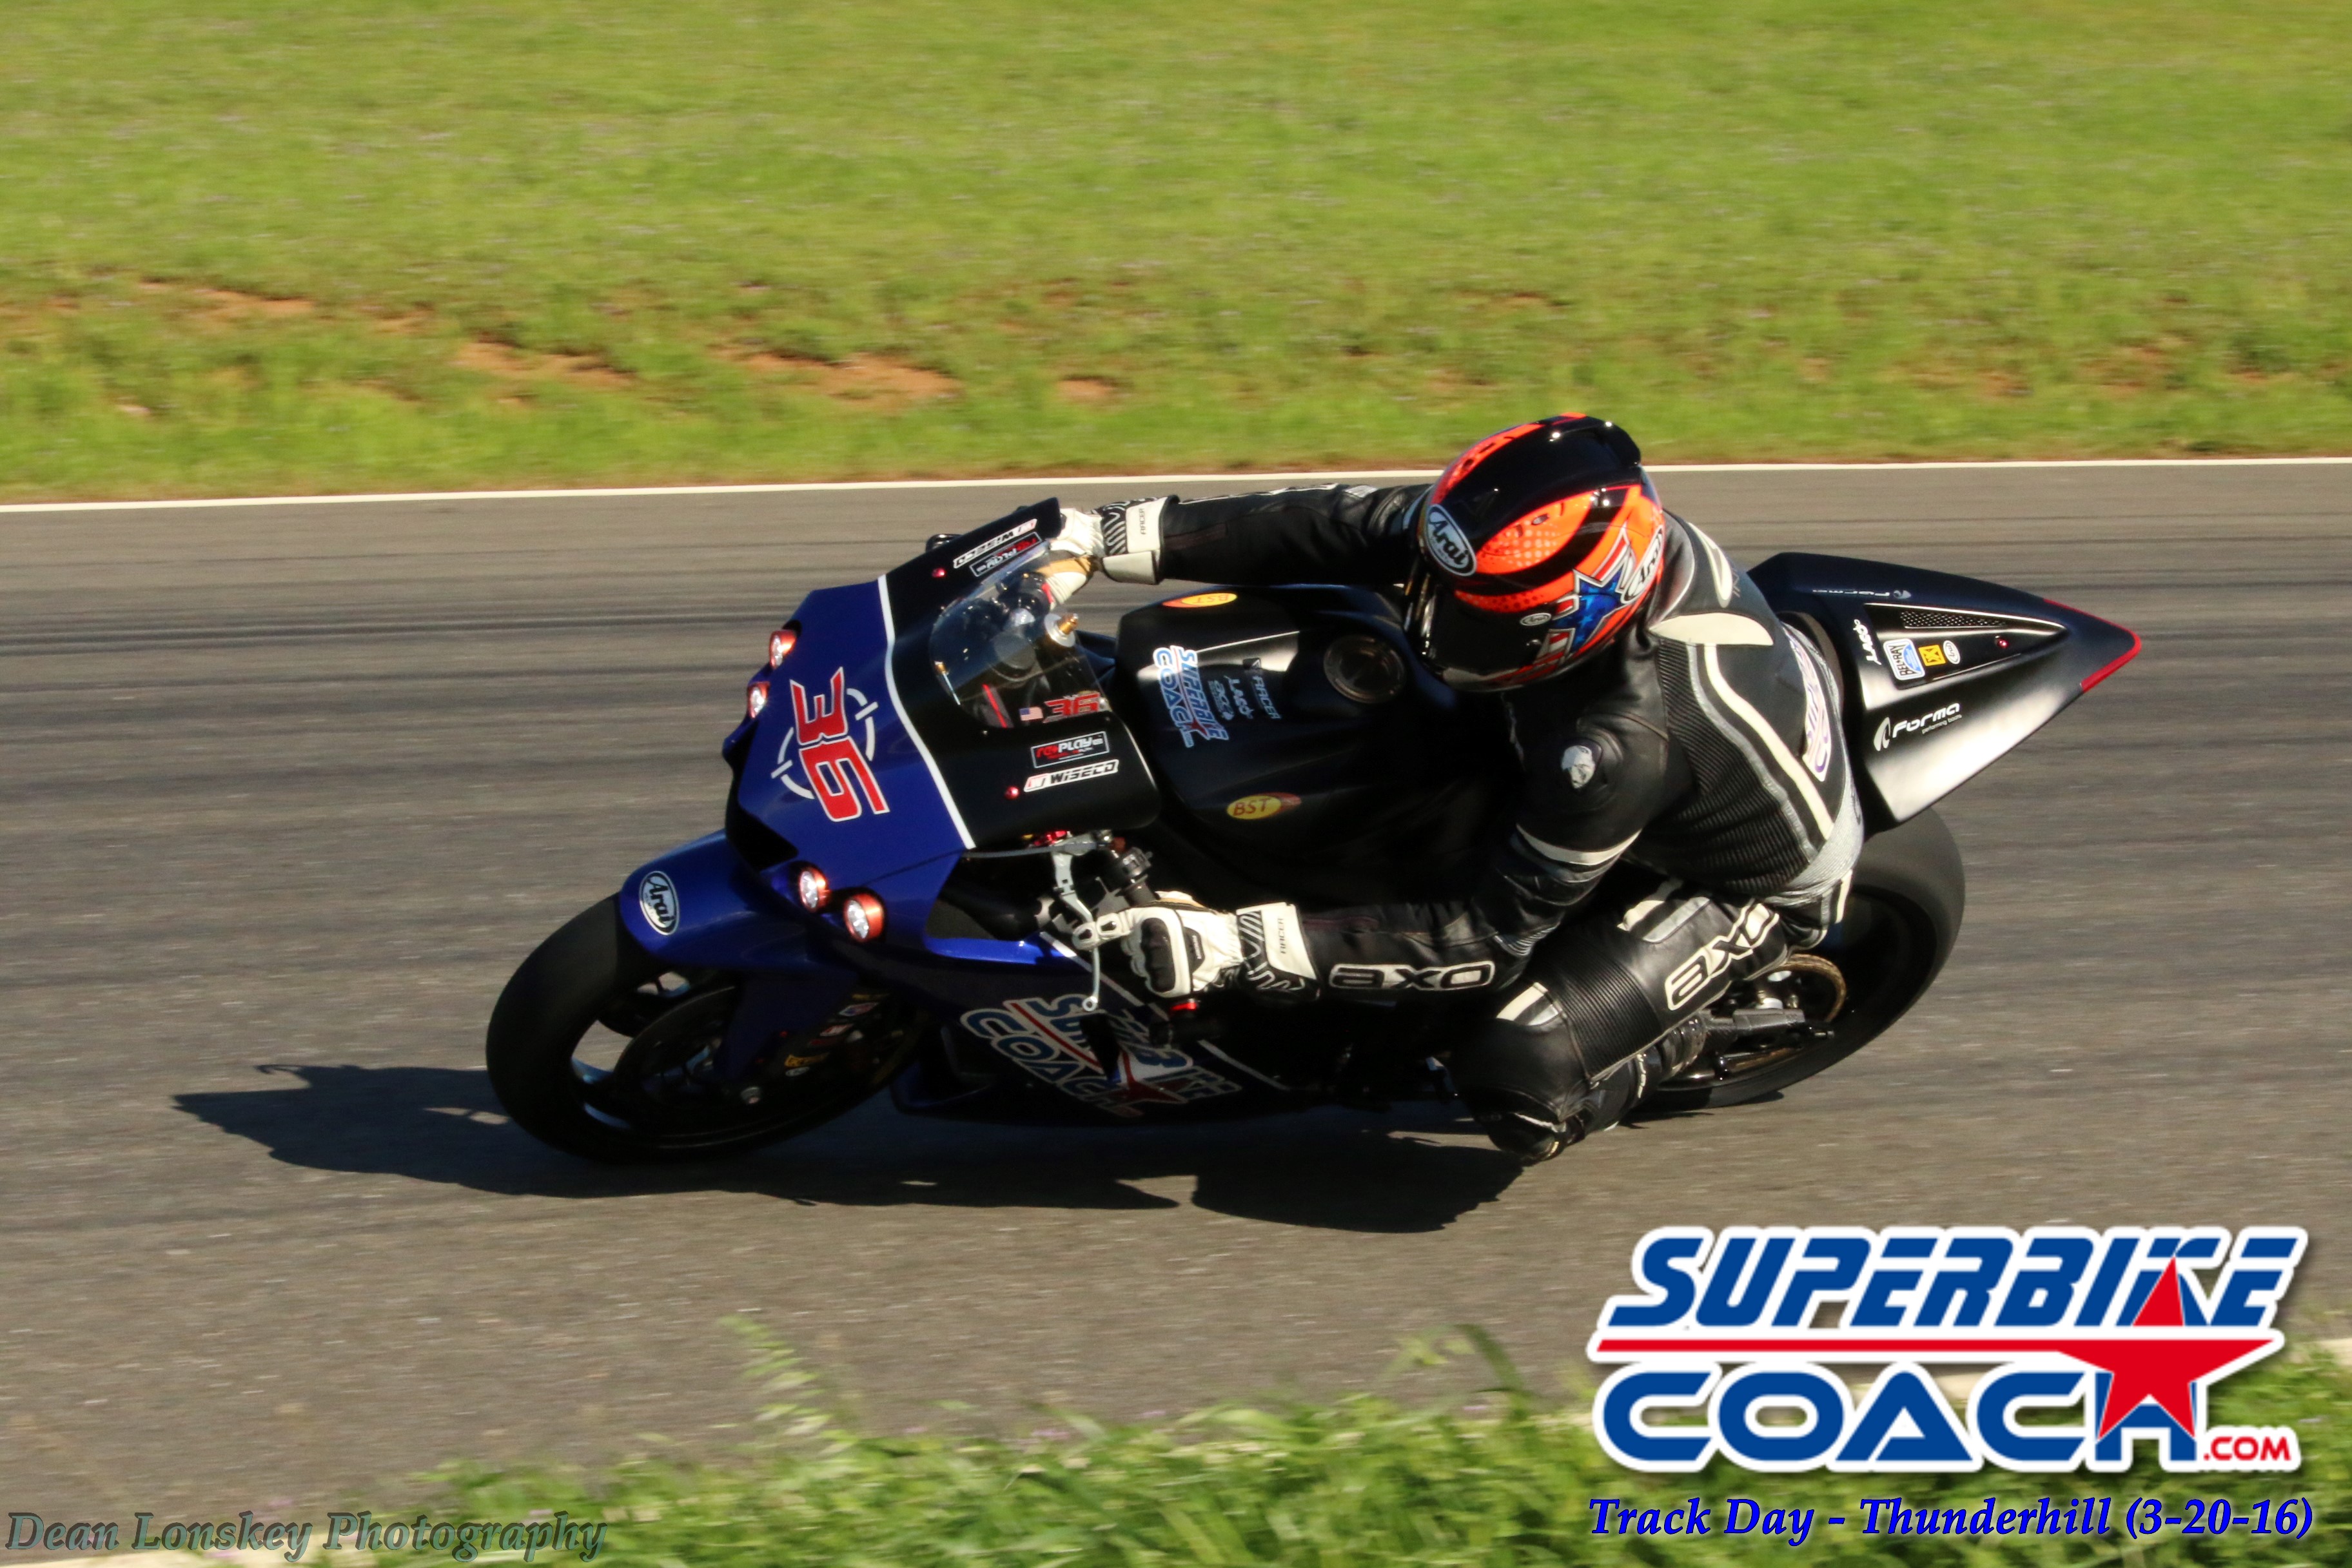
This video displays how respectful and careful we are handling our riders at our track days. We have space for every rider level and every type of motorcycle in one of 4 groups. Coach Can Akkaya is in almost all sessions out to lead the line and to have some fun himself as you can see. Our track days are highly reviewed. Come and see yourself.
https://www.superbike-coach.com/wp-content/uploads/2013/12/Superbike-coach.com_TrackDay_9-e1486486518981.jpg333500PageAdminhttps://www.superbike-coach.com/wp-content/uploads/2014/12/newlogo.pngPageAdmin2016-03-23 23:06:462024-01-15 00:06:241st Superbike-Coach Track Day highly reviewed
Mostly the rules are equally the same from one track day organizer to another, though they are slightly different in the detail- so check on this before you sign up. Since our track days are more track beginner orientated, you might check on what we are require and recommend to get prepared:
Signing up for a group
That’s pretty much your first challenge, isn’t it?! But don’t ya worry, we have plenty of options to make a confident pick. These are our recommendations and policies towards your level and bike you want to bring. Also to look at each group rules and restrictions gives you an idea where you personally feel most comfortable in:
C group : Intermediate and low experienced street/track riders- on touring/cruiser/sport bikes. Passing only on straights 5 feet buffer.
B group: Advanced and Intermediate street/track riders- sport/touring bikes. Passing 4 feet buffer.
B+ group: Experienced track and street riders- sport and race bikes beyond 500cc. Passing rule 4 feet buffer. Power wheelies OK.
Talk to us after 1 to 2 sessions if the group you’ve picked is not a good match so that we can change things for you. Then you might know why it was bad to pick a group based on where your friends are :-)
Check your Bike
You don’t need to be a mechanic to check these things on your bike- but we do recommend to have it checked by your garage or dealership early enough:
Check for oil moist or leaks under the bike and see oil filter and drain bolt are tight with a proper wrench.
Check your chain slag and set it right according to your manual
Check your brake pads and worn rotors. Also consider the age of your braking fluid
Check rest life of your tires. If you are worried about your tires: GO CHANGE THEM BEFORE YOU HEAD OUT (we have no tire service in the paddock because we believe that you are just hell of badly prepared coming with worn tires to the track). Besides knobby tires, we allow all tire types, because you should know best what they and you are capable of. Inform yourself for recommended tire pressures, because we don’t know.
Bring rain- or street bike tires if it supposed to rain. All track day events and organizers are- like ours- rain or shine, and nobody gives rain-checks!
Required is it to tape (painter tape is good) over mirrors- or remove them.
Suggested is it to tape over your speedometer. You do not need to know how fast you are. It is an unsafe distraction!
Suspension setup: Don’t waste time and money on this too much. A better rider would make 10-20 seconds less on your bike with the same setup. Just come out and have fun!
Required is it to remove action cameras on the helmet, but we tolerate mounting them to your bike. Please check if they sit tight, because we’ll keep them when they fall off :-)
Required is it to come with a full gas tank and to refill after 4 sessions! We are not tolerating a red flag for a empty gas tank, and we won’t trailer your bike until lunch break or after end of the track day.
Check your Gear
It is time to consider your PROTECTION- the motto… the more the better! Regular street rider gear is fine. Nobody else then yourself is responsible for a road rash you may get. In case you need to add some gear- once you’ve registered with Superbike-Coach- you’ll have access to great discounts by our sponsors. Take advantage of it!:
We accept leather OR textile as long pants and jacket are zip-able. If not zip-able or one-piece, you are required to have a back protector, but be aware that the Thunderhill staffs might take you out (this is not on us!). Nobody else but you is responsible for the road rash you’re getting. However, protectors are required in these areas: shoulders, elbows, and knees.
Required are ankle covering leather street or race boots. Cordura hiking boots or some ankle boots are not acceptable. Forma Boots USA holds a 20% off discount for our riders. Makes it to a no-brainer!
Gloves must be in a good condition, gauntlet style with closures are required.
Suggested are earplugs, which are making riding more enjoyable and makes it easier to concentrate
Helmet Requirements: Snell, BSI, DOT, or ECE R22.05 approved full face helmet (high impact tested). Helmets with any visible crash (beyond scratches!) damage will be rejected.
Until then…
I personally recommend NOT to look for videos to learn the track. Even if you find good once (I never did), you are on your own on the track, and the ‘video’ gets lost in your brain anyway. Also do not ask ‘specialists’ for the line… I run a line seminar at lunch break, after you warmed up with the track and know where the asphalt band goes so far. This is why we set up the lunch break early (noon). Also skip on ‘suspension specialists’. Your bike has resources you don’t know, and you have much more important things to think of… to ride the damn thang and to have fun! All of these things are just making you nuts and you can’t sleep anymore…
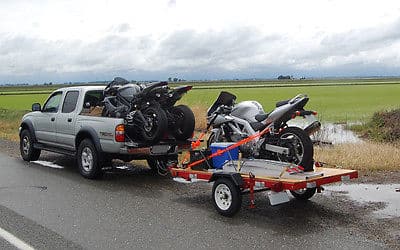
How to load and what to bring
The day finally has come, and you are ready to go. There are more ways to get your stuff to the track. Yes, riding your bike to the track will be fair enough to see if this is a hobby for you or not, but please check your options here as well:
To bring everything you need to the track has to be organized. A pickup truck or a trailer does the job. A U-Haul rental can help out maybe, because in case your bike brakes down- what then?! How to load a pick up truck and what it needs has been described in the article below.
Bring water, drinks & lunch to keep yourself hydrated and your energy up throughout the day. A ice chest is like a good friend
Bring the bike with a full gas tank but bring a extra fuel can. Fuel pumps are available at the track if needed, but pretty expensive.
A little canopy gives you some shade between your track sessions, and to have a camping chair helps to relax. Take your boots off, or even change completely helps me to re-center when I put my armor back on. Try it! Our Air Conditioned Clubhouse is a great place to hang out too.
If you have, bring Duct tape, bike stands, wrenches and other tools, tire gauge
When to go- Where to stay- What to do
Make your travel plans early with Google Maps so you know when to get there. You might also check for close by Hotels if your travel is long. The track does not allow camping in the paddock. If you do it anyway, you might get a bill from them! There is a place to camp right at the main gate though. However, be 15-30 minutes early to enter the gate, which opens at 7:00am with a long waiting line.
Registration and Tech inspection
Chat later, and walk up directly to the Clubhouse (!) to make your CHECK IN with us and to sign waivers which you’ve agreed upon online already. The staff will put a stamp on your hand which you need to enter tech inspection. Now you find quickly a spot in the paddock and set up and bring your bike (or two if you have) and helmet to our TECH INSPECTION where we look over what you should have done (above) in YOUR OWN INTEREST already. If you passed the inspection- our staff will put you a sticker on your bike(s) according to your group. You might have some time to chat now and to relax, but make sure you’ll be on time in the Clubhouse for the obligatory RIDERS MEETING AT 8:15am (no tolerance for missing it- no refund!).
While B+ and B group can leave the clubhouse- C group will have to stay to receive more instructions and to get prepared for our ‘Track newbie sightseeing track session’. After this you should gear up and check your tire pressure (see above). Have our time schedule and to listen to the radio announcements helps to not to miss your session. We are not responsible for this, so print out the time schedule below and watch the damn clock. Quick overview:
7:00am Gate opens
7:15 – 8:00am Check In open, in theClubhouse
7:20 – 8:10am Tech Inspection open, at the Clubhouse
8:15am OBLIGATORY RIDERS BRIEFING, in the Clubhouse
9:00am Track sessions begin in 20 minute units with group B+, B, C till lunch break
1:00pm Lunch break
1.20pm Free Coach Seminar ‘Ideal Line West’, in the Clubhouse
2:00pm Track sessions continues in 20 minute units with B+, B, C till 5pm
5:00pm Track sessions end
5:30pm Gate closes
Download entire time schedule here: PRINT OUT time schedule, SBC track day 8/27/2023 [ddownload id=”9986″]
Your 1st session and tips
The time has come and you are rolling to our track entry, the hot-pits. You stop by the tent and check if the SBC sign is showing your group. Our staff will check if you are in the right group and if you are wearing the required gear. Zip it up and check you helmet strap. Don’t sneak out without proper gear… we’ll get you anyway and your track day is over. Wait for instructions of our staff, who are letting only four riders at a time out on the track in a 5 seconds frequency for a well spread.
Warning: A) If you try to sneak into other groups… Your day is done and you’ll be blacklisted! B) If we see you ‘teaching’… Your day is done.
And here are my tips to you directly!:
Turn on your brain from the first time out and don’t do the ‘street sightseeing’ thing. I’ve seen riders clocking up the entire track. Don’t be the guy and keep the damn thing rolling
Focus more to the FRONT and stay calculable for others on the throttle with both hands on the bar
Don’t change lines rapidly and NEVER do zig-zags to warm up tires
Don’t close the door on someone and do not release the brake… let the guy pass. You are not Marc Marquez!
For ‘the faster guy in the wrong group’: Be patient and don’t get frustrated. Stuff like that happen all the time and everywhere else too. You are might be in the right group when all the others had some more time to find their rhythm. If not… come and talk to us after your 2nd session and we’ll help to get you into a more suitable group if possible
For ‘the slower guy in the wrong group’: Be patient and don’t get mad. Stuff like that happen all the time and everywhere else too. You are might be in the right group when you get more familiar with everything and found your rhythm. If not… come and talk to us after your 2nd session and we’ll help to get you into a more suitable group if possible
Find your own rhythm, and don’t try to copy someone else rhythm. Relax and keep breathing. Have fun!
ATTEND MY LINE SEMINAR
Track Etiquette
Warning: If our staff pulls you out for violation… You take it ‘like a man’ and say ‘Yes Sir’, even if you get a mark onto your group sticker. If you argue with us- your day is done. If you get another one for an X- your day is done.
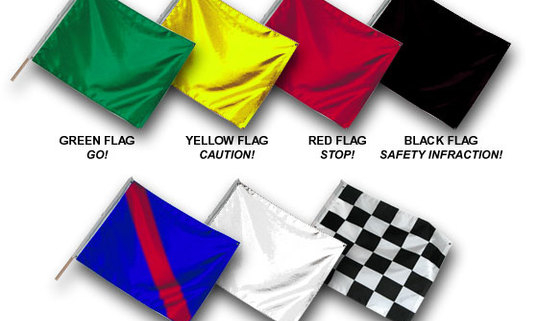
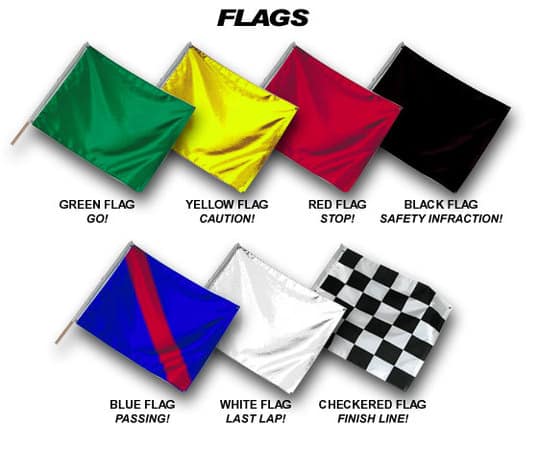
For all racers and sport enthusiasts, the information in these two subjects should be ingrained in your brain. Know all the flags and the procedures that go with each one. Know the pit in and pit out procedures and how to properly signal. Don’t have any doubts about these before you get to the track.
NO STUFFING! Let’s say you make a pass around a rider and cut back in front of him/her entering a turn. You think it’s a safe pass but the rider you just passed is having to grab the front brake to keep from hitting your tail section. You just STUFFED the rider. OR you make a pass and the rider has to change his/her line entering the turn. Again, you just STUFFED the rider. In both cases, you are violating our rules and we pull you out!
AGGRESSIVE RIDING! Aggressive riding is strictly prohibited at all of our events. This includes all groups. Our schools and track day groups are for riders to learn and enjoy themselves on the racetrack. This is not a race day or a timed qualifying practice. Forget lap times. There will be times on track when you have to give way to slower riders. Remember, you are there to have fun, not set a new track record.
FLAGS AND SIGNALS! Look back before you enter the track and do not go on the ideal line until it’s clear. Check back before you close the throttle and give a permanent left hand signal if you decide to exit the track. This are the standard flags set you need to obey at all times:
Faster Riders and Racers! The slower rider OWNS the track. Take time and make a smart decision on a passing and allow buffer according to the group. Be a role model, not a jerk!
NO BIKE CONTACT! In the event you make a mistake and make contact with another rider, you are done for the day.
Special Coach note: We pick out hooligans real quick. Zero tolerance and no mercy for violations ON AND OFF THE TRACK! This is a beginner orientated track day and you need to expect they won’t ride as you wish they would. Disrespect and ego are not welcome at Superbike-Coach events. Don’t get into fights with someone and let us know. Only then we can help!
Superbike-Coach conclusion: Don’t make a big deal out of it. Riding on a track is overrated and pretty much the same concept as you were riding your bike on the street. Other organizers promising you will lean much more in one track day as in a year of street riding. This is BS, unless you have someone showing you the right things to do on the track. Most confusing will be the gigantic width of the track and to be worried whats going on behind you. Try to cut this out and give a little trust in others. Just relax and have some fun.
Headcoach Can Akkaya, Superbike-Coach Corp
https://www.superbike-coach.com/wp-content/uploads/2014/12/trackday-flags.jpg450538PageAdminhttps://www.superbike-coach.com/wp-content/uploads/2014/12/newlogo.pngPageAdmin2016-02-27 11:20:112024-01-15 00:11:55How to prepare for a Superbike-Coach track day
The ‘Cornering School Day’ program has been in the Superbike-Coach portfolio for almost 10 years now and it’s super popular- though, it seems that there are still some misunderstandings about what this program is actually. So this newsletter will clarify what my class is- what it delivers- and why this thing has been so popular, so that you need to ask yourself ‘What am I waiting for, and why should I look out for something else?!’.
This article will clarify all misunderstandings and aspects of this unique program, and will point you to the section of the newsletter where it’s going to be clarified. So go and switch back/forth to the newsletter blocks and come back here to read on the next point. Now let’s have a look at the “top ranked” misunderstanding first…
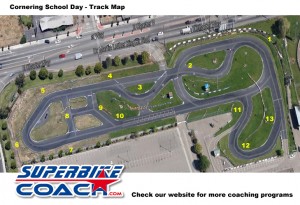
Superbike-Coach track: 13 challenging turns
About The Track
Some people saying without knowing that: “This track is too small- the track is too tight- the track is nothing for street riders- the track is nothing for track riders”. The ‘funny’ part of this is… most of them haven’t been there- ever! Those riders who was there know now, that there is no difference of the physics of riding you need to understand and to deliver. My track has everything what most street riders have to face every day… tight turns- switchbacks- left and rights- which is what most riders are having truly problems with… see the conflict?! I give all the keys to really take advantage of this track and to be in such control you probably never find somewhere else. Other than that I am able to stop you whenever I want and to point things out for you. Can I do that on a ‘big track’?… no I can’t. Also the short repeating frequency helps you to fix things. There are more advantages, but I don’t want to bore you, so keep going…
Superbike-Coach classes are entertaining
About The Coaching and Subjects
My coaching style is way different as you might know form other teachers. I’ve learned my stuff the tough way, all on my own. At this point I should mention that I was holding lap records, achieved Pole Positions, and won some races on International Pro level… oh, and I almost made it to the ‘Top Gun’… to MotoGP. I learned in 40 years of riding and being 11 years in professional European racing- that absolute honesty about a performance is key to get things done quickly and to stay healthy. My passion to show you how it’s done grows with your eager to learn. Yes I hate quitters- and I’m telling ya because I can see. I have a very specific way to make you listen for better understanding, and to make you doing things you’ve never done before with a “Yes Sir!”. So all I am teaching comes from 1st hand… no copied stuff like other schools use to do. You think I show off with my background… heck why not, because some other totally overrated “coaches” coming up with 2 years of racing experience… in other words… no more than on regional amateur levels, so no wonder they don’t teach Trail Braking and counter steering properly- but I do!
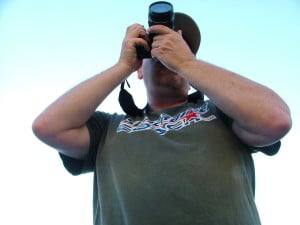
superbike-coach free sport photography
The Amenities
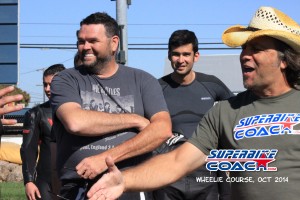
There is nothing you could compare to our Cornering School Day events. We’re state of the art- even if we don’t come up with a high gloss painted 30 ton truck, and 30 traction-controlled liter bikes for an expensive rental fee. Does that make sense anyway… no, because you need to learn on your own bike, so that you are in your comfort zone quick- and your focus is not locked into a bike you’ve never used before, and you’ll never gonna use again! Oh, and we are taking care of our people. Whatever it is… coffee, water, snacks, pizza order… we’ve got you covered. But you know what really cool… that you don’t need to make such a huge deal of it to bring your own bike to a track. So no track specific bike preparation, and no track orientated gear necessary. Superbike-Coach photographer Dean Lonskey makes about 1500 pictures of our students on the track… FOR FREE. How do you use to call a total package for under 150 bux again?… a no-brainer!?
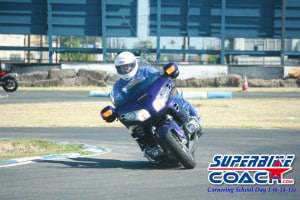
Coach Can instructing his student
The Idea
The concept of the CSD program is designed to make better riders. CSD-1, 2 and 3 are well spread all over the year so that it fits into everyone’s schedule. You pick when to keep going. The program is too big to fill in one day, and it will overwhelm students easily. The advantage is clear. Each day build onto the other, and there is plenty of time in-between to settle freshly learned skills. Once you’re coming back- you and your coach will notice your development and what to go over again. This is a key for a better coach/student connection as well. The website makes date picking easy:
We also can setup an entire CSD event exclusively for your motorcycle club, company or dealership. We’ve done this for many already, even for Google riders for example. Right now we have CSD Specials scheduled like- Cornering Gals, and Cornering GoldWings. So if you have a group of at least 25 riders… contact us and see what we can do for you guys.
Hundreds Of Testimonials
Still not sure if this is the right thing for you? Well- why not checking hundreds of 5 star reviews all over the internet and read yourself what others have experienced and why all of our 2015 classes were booked out! This must have a reason, don’t ya think?! :)
Yes I can’t reach everyone… nobody else can either! Nothing is perfect… how can it?! So give it at least a shot and join in to see if I can reach you- cuz’ if so- good things are going to happen.
Can Akkaya, Headcoach of the Superbike-Coach Corp
https://www.superbike-coach.com/wp-content/uploads/2016/01/Superbikecoach-cornering-day-1-24-16-2-e1486486552133.jpg333500PageAdminhttps://www.superbike-coach.com/wp-content/uploads/2014/12/newlogo.pngPageAdmin2016-02-17 12:40:162024-01-15 00:16:26Cornering School FAQ ‘n’ Stuff