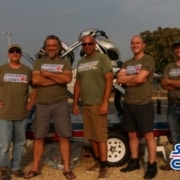
This was a extraordinary class last Sunday. The success rate is also pretty high, though we had 2 crashes. Luckily they are doing OK as I’ll stay in touch with them.
I felt everyone’s eager, but it was expected that not everyone is going to make it, so I hope that they could get value out of it anyway. I am proud of each one and so is the rest of the Superbike-Coach team.
My photographer, Dean Lonskey sends greets and THANKS for leaving him a tip. He loaded some featured pics of the class up which cuts your waiting time until 1200 free pics are finally uploaded by the end of the week.
https://www.superbike-coach.com/wp-content/uploads/2018/07/superbikecoach_wheelieschool_2018july29-e1533105857895.jpg337600PageAdminhttps://www.superbike-coach.com/wp-content/uploads/2014/12/newlogo.pngPageAdmin2018-07-31 23:46:482024-01-13 11:24:14Extraordinary Wheelie Class
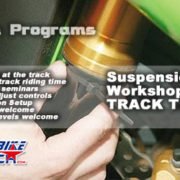
Imagine, there was a class where you could ride all day on a race track for only 49 bucks. No hassle, no distractions, no drama. And now picture all of this would be perfectly organized in level groups on a track which wouldn’t be too far away from you. How cool would that be?! Let’s take it further… imagine that you could add a workshop to it and to get your bike dialed in at the same time by a professional- or even better- you would also get the knowledge, tools, and a helping hand to learn how to do that stuff on your own. That would be killer right!?
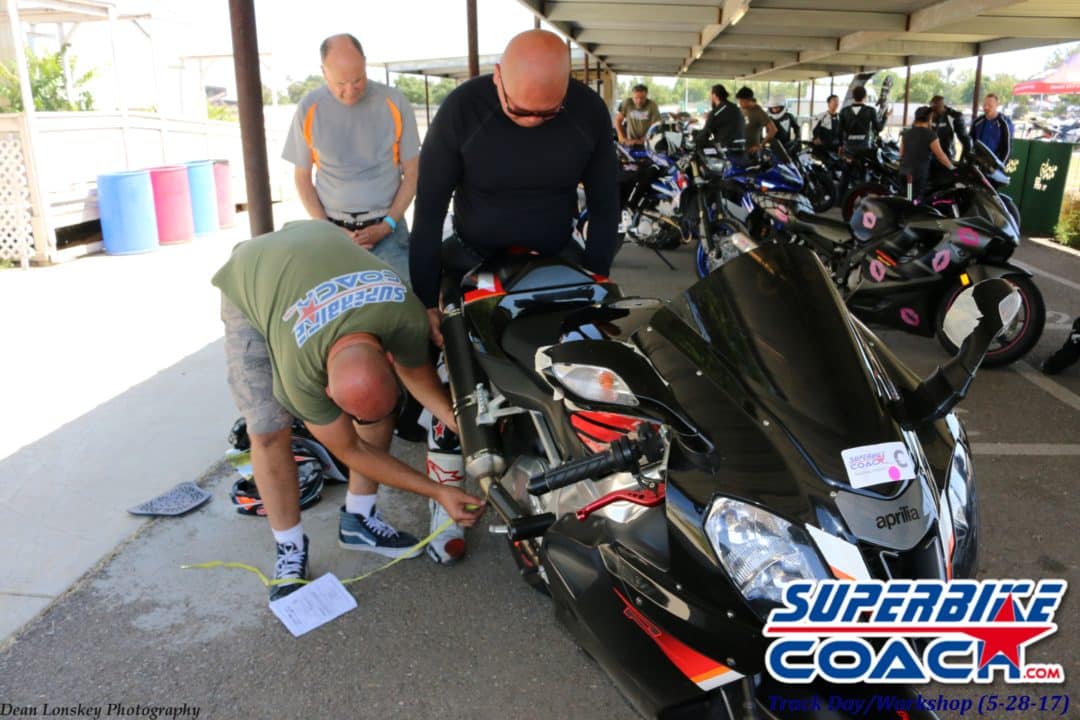
I’ve seen riders struggling with their bikes- or in bad cases- they even get hurt just because of lack of reach-ability. How’s this possible?!… well, you can go install a light switch too high for someone to reach, and see how long it might take to turn the damn light on. And yeah, the subjects seem complex and the fear of wrenching the bike is big. This is why we’re there to check on your baby in regard suspension, lever adjustments, tires, throttle free play, and lots of other stuff. Together with you, we’ll make significant changes for the better. Let me tell you some stories and literally terrible things we’ve discovered in the previous… …classes. There was a female rider in our workshop, and her throttle didn’t return at all. Her answer–“I’m used to it”– is not helping, but we’ve fixed it for her. Another rider installed an aftermarket front brake lever and didn’t even notice that the damn thing hit the starter button housing, which restricted the full potential of the brake down to 30%! Another rider just got a racing rear shock installed for about $2 grands incl labor, The damn shock didn’t work at all and was as stiff as a stick. The rider thought it was all in the setting, but it wasn’t. I bet if he would have lost traction and to crash, he wouldn’t even know that the shock/shop was responsible for a possible injury.
Quite frightening huh?! But that’s not all by far… missing bolt in the master braking cylinder, cracked handle bars, loose steering stems, leaking seals; and top on the list… a fully destroyed rear sprocket where the f’d up chain just skipped all those rounded teethes. Oh yea, and the rider actually assumed it was a broken gearbox!
On the suspension side in previous workshops, we helped riders to find their bikes more agile and holding the line better. Some report to literally have a new bike feel. Bottoming out, lack of grip and overly worn out tires they complain about; even after they have had ‘specialists’ working on their bikes. Why?!… because with them, you can’t go out on a track and learn to report- learn to ‘what to focus on’ while going through specific sectors- then to come back and to directly work on issues. With the Superbike-Coach ‘Workshop & Track Time‘ class… you can do all of that and have a fat grin on the face at the same time!
Now… you wanna blame me for pointing things out in all honesty, or the shop which makes a front brake work on 30% only?! Your choice.
https://www.superbike-coach.com/wp-content/uploads/2014/01/workshop-portf.jpg250400PageAdminhttps://www.superbike-coach.com/wp-content/uploads/2014/12/newlogo.pngPageAdmin2018-07-03 09:44:482024-01-13 11:24:43I really don’t get it
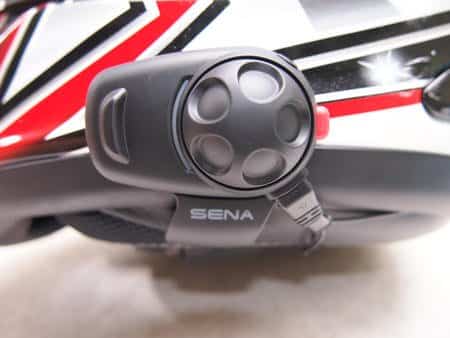
I am happy that I can announce that SENAhas become a new sponsor to the Superbike-Coach Corp. This will benefit especially our students on 1on1 or small group coaching, because the quality and reliability of the Sena intercom and video systems.
We are mainly using Sena 10c and SMH5 Multicom units, which are super functional for us and extremely quick connecting and to swap. But that’s not all.
As usual, our sponsors are holding discounts, exclusively for Superbike-Coach students- and so will Sena.
We are looking forward to a hopefully long and successful relationship with Sena.
Headcoach Can Akkaya, Superbike-Coach Corp, Sacramento, CA
https://www.superbike-coach.com/wp-content/uploads/2014/12/newlogo.png00PageAdminhttps://www.superbike-coach.com/wp-content/uploads/2014/12/newlogo.pngPageAdmin2018-06-29 23:28:502024-01-13 11:25:02Sena is a new Sponsor to Superbike-Coach
…has been done, and ones more it was totally booked up!
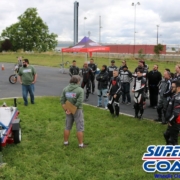
120 riders, mainly our students from all kinds of programs joined us at the wonderful Thunderhill West Raceway in California. The weather was perfect, because this time it wasn’t too hot. it helps, but it doesn’t make our job any easier, because we literally care about every single rider and to make it as safe and fun for them as possible. Yep, I know that this is a phrase everyone use to say, so I want to make this a little more detailed to give you an idea.
June 10th 2018. I got a hotel room for my team up in Willows while I had about 2 1/2 hours of sleep the night before to make the final preparations. My wife Marion and I drove up in the early morning to join the team at the gate at 6.30am, and luckily we could get right in to set everything up. Within 15 minutes we have an operational registration in the Clubhouse- the tech inspection area- the photographer station- and the grids in the pit lane, loaded with tents and ice chests for our Control Riders Ben, Michael, Brian, Steve, and Connor. Then quickly unloading all bikes, and off we go.
Marion and Michael in there elements, running 120 people through paperwork to ensure that everyone has time enough for Tech. Jeremy, Steve, Brian and Ben checked the rider bikes while Superbike-Coach photographer Dean and I went out on the track to inspect the track and run off areas, where we found a small problem which had to be fixed. After a short briefing with the track admin and track Marshall’s I could have at least 10 minutes of face time with the people in the paddock.
8.15am, the mandatory riders meeting begins, while Marion finishes up late comers. I go over essentials the ‘Coach way’, and I always realize the discrepancy individuals experiencing when they dealing with me the very first time. On one side the riders who have been students before- and the riders who are new to Superbike-Coach on the other. While most of them know what kind of train is rumbling through the Clubhouse- some are quite surprised by it. That’s because they get to see only a fraction of the big picture. That’s hard to understand within half an hour, so I am always hoping that the new riders to us look around and to see/feel why we’re having hundreds and hundreds of loyal students which we use to call ‘family’. So at that point, the efficiency of my coaching style is priority, and I don’t bent that just to make a better impression. You get it in course of the day- or you don’t! So maybe this here helps a little…
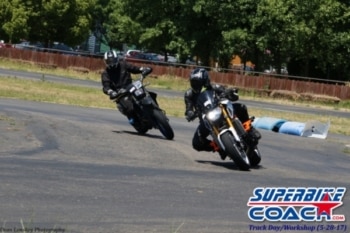
While B+ was out for their first stint, I gave C group instruction for their sightseeing lap and to answer more questions. At this point a detailed ideal line seminar would not make any sense. We have this going right after lunch, which is why the break is scheduled relatively early.
From there it use to be quite messy, until riders are dialing into better rhythms and getting sorted into more appropriate groups matching their levels. That’s a pretty natural and common thing and comes when riders pick a group based on where their friends are. So from there, Marion was working her butt off to exchange riders within the groups- based on their input and also quite often triggered by my control riders. That is going on for hours and Marion’s organization skill kicks in real good.
Meanwhile, the boys following up on passing violations. At that point, the penalty-system we’ve developed could help a lot, which was clearly see and feel-able from the afternoon sessions on. In total 6 for apexing 2, 3 for passing under yellow, 1 for cheating into other group, 3 for passing close, and 1 got suspended from our event. Can they see everything?… how should that go?! I mean, even we would double CR’s- there is still stuff they can’t see.
Can we do better?… oh yes, and we will. There are already changes in the making. Things which keep setting Superbike-Coach track days apart from others. Just like SBC photographer Dean, who took about 4700 pictures which are coming with our 150 bux track day ticket, so for free.
Six crashes is not what I like, but it’s the nature of doing these things. The positive side is that no one got hurt or crashed because of someone else. My boys checked their bikes while Marion had the riders send to our Ambulance/Doctor for a checkup. Only one red flag was shown for about 10 seconds and got lifted- so not a single time out for our riders, because we were on this in light speed.
Thanks to the entire team to help pulling an event off like this. I love this team for their skills and especially their dead serious dedication and loyalty to Superbike-Coach. Also thanks to our riders for being cooperative, understanding, and patient participants. Hope to see you again on 9/8/2018 for another Superbike-Coach track day at Thunderhill Raceway!
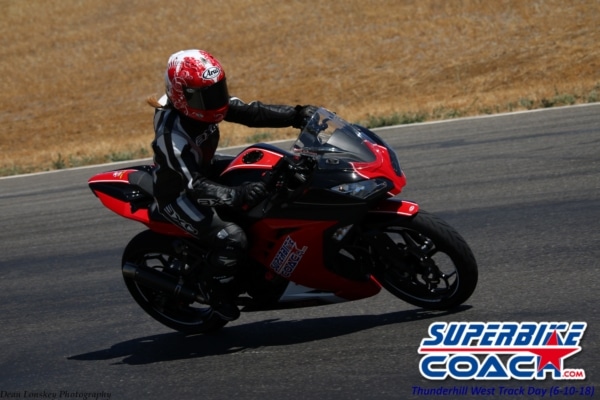
I can’t believe how quickly time went by. We just finished an amazing Knee Down class and Wheelie Course (end of April), and now we’re preparing for our track day at Thunderhill West Raceway on 6/10/2018. It seems we’re booking up again, because only 38 spots are left.
So in a little less than a month, Superbike-Coach will run another track day, the way it should be…. available for every rider and bike category- hassle free and without ‘instructors’ who just race each other by ignoring their own rules. In fact- about 80% of our track day attendees were my students before in all kind of SBC programs, which means that there is a solid level of respect for each other and for what we do. Of course, nothing is perfect, and so also we try to keep improving.
However, I want to point out that a Superbike-Coach track day is different in the detail as well, and that begins with our level group selection. Since we do track beginner orientated track days which are more fun and safety focused than to be fast- we run three groups in 7×20 minutes sessions. Dividing riders in C group (probably the slowest, most inexperienced)- B group (intermediate riders with low track experience)- and B+ (up to slight more experienced riders). Take to note that our B+ group is pretty much a extension of the B group. So no A group, but we do welcome some A riders and racers in B+ all the time, and those are the ones we know that they can ‘hold back’ and track with respect. Low key is cool, because ya’ll have a Monday to do.
Often riders ask if a class is mandatory to even attend our track days. The answer here is no, everyone- and on everything can join. We offer “I always wanted to do this ones, but without the drama” track days. That means you don’t have to have a racing suit- you don’t have to prep the crap out of your bike- and you don’t need to be worried about the ‘chicken strips‘ you might have. We try to bring riders, despite the category or level, to the sport in the most hassle free and possible safest way.
https://www.youtube.com/watch?v=7pi54483RWM&t=4s
The more the better, but street riding protection is fine if it is for you. In the end, you go the same- or even higher risks using regular riding protection for street riding. In regard bike preparation we only ask to tape the brake light and to remove mirrors (or to tape them).To get started, you might want to read my article ‘How to prepare for a track day‘. There are rules, flags, do’s and don’t’s, and a bunch of tips and suggestions around your entire track journey, so good stuff actually. If that leaves questions open… you might post a comment on the Coach blog to get the answer.
Now here is the deal… Superbike-Coach track days are always booking out, and that’s beyond the fact that we are not leaving turns out- that we include free sport photography- a Ideal-Line-West-Seminar- and a C group orientation in the morning… all for only $150. So if you want to get in… now is the time, because only 38 spots are left!
https://www.superbike-coach.com/wp-content/uploads/2018/01/Superbike-Coach-track-day-on-June-10th-2018.jpg5081000PageAdminhttps://www.superbike-coach.com/wp-content/uploads/2014/12/newlogo.pngPageAdmin2018-05-14 23:43:312024-01-13 11:25:46It’s Time For Some Track Fun
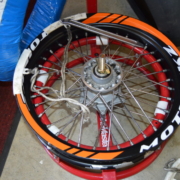
We at Superbike-Coach have quite a bit of tires to change during a year and we use to let local dealerships do this job, but a recent price raise to flip and balance tires on rims by about 80% is unacceptable. Well, at least for us. So BikeMastergave us their ‘Tire Change Stand‘ which allows to mount the rim, to break the bed off the rim, and to un- and install tires within 15 to 30 minutes.
I know, this kind of work is not for everyone, and neither I like it… but after all you might find out it ain’t that bad. So here they are… brand new Bridgestone rubbers for our rental bike and my beloved Supermotard. Those Battlax are solid tires with lots of grip and last for the money, so off we go…
The total is about $100 in tools, which means it pays off at the first tire change you do. Besides… a regular Sportbike street rider probably has to change tires twice per riding season. You make the math.
I just swapped tire on a rim within 15 minutes, and that was the first one I’ve ever done. Having the right tools helps, and it went much better on the second tire. OK, a helping hand was necessary along the mounting part, but with the saving got us a nice steak and a beer :-)
We decided to replace the balancing with ‘Dyna Beads‘, which are filled in the tire when mounting. No more weights glewing to the rims and vibrating free.
So if you like working on your bike and if you are tired of price raises of astronomical dimensions, then this is the way to go. Step up your game riders! :-)
I’m still super tired and sore after such a weekend of coaching. My voice is coming back slowly :)
After the 86% success rate of the knee down class last Saturday, we’ve done the wheelie course on last Sunday and it WAS A BLAST.
People from all over the country and foreign countries came see Superbike-Coach for that one. I am so proud for them and my team to pull this off. Lots of energy, euphoric and spirit to feel though out the event. Our mini-wheelie bike is a big fun factor- even it’s been a huge challenge. Once more it broke down, but my tech Brian Hunnicutt and even photographer Dean Lonskey helped to put it back to action ASAP. Great effort.
New team member Jeremy French had a tough first 30 minutes. No wonder, cuz’ I dropped that boy in the cold water. From there, he operated our new wheelie machine like no other and put a happy face on all of those 30 students. Marion Akkaya and Ben Mccrae who are in charge of a damn complicated time/group schedule and preparing for me 1on1 wheelie bike students put love and heart into it. Amazing job guys!
A 65% success rate doesn’t sound too much, but despite the fact that this wheelie course is a hell of a ride… everyone gets something out of it for sure. I think Dean Lonskey’s featured pictures are displaying this pretty good.
I didn’t had too much time to relax, because I taught a brand new rider yesterday (Basic Rider 1on1) and I’ll have a Road Skill 1on1 to do tomorrow.
I can’t be more happy with the SBC team and I already look forward to our track day at Thunderhill Raceway on 6/10/.